Art and Creativity

Art is important for children especially during their early development. Research shows that art activities develop brain capacity in early childhood; in other words, art is good brain food! Art engages children’s senses in open-ended play and develops cognitive, social-emotional and multi-sensory skills. As children progress into elementary school and beyond, art continues to provide opportunities for brain development, mastery, self esteem and creativity.

Monday, August 06, 2012

Collaborative Art & Inspiration


Sometimes I feel like I work with angels. I just heard the most inspiring Conference Keynote and felt so proud to be a teacher. I was standing in the back of the room, listening to a Superintendent of Education inspire a room full of educators, all readying themselves for the new school year cycle. What’s not to be proud of when you realize how much the world needs good teachers?
I was reminded of this quote:
“Teachers are expected to reach unattainable goals with inadequate tools. The miracle is that at times they accomplish this impossible task.” ~ Haim Ginott

With inspiration in mind, I’m posting some of my favorite Collaborative Art ideas to help put you in the mood for a creative summer, and to prepare you for working with your new students this Fall. Collaborative Art can be such unifying, positive group experience, and open-ended art is a great way to bring people together in a feel-good kind of way. 

(CLICK HERE for Inspirational Quotes to download and print)

The teachers from Stephen S. Wise Nursery School are photographed here at a back to school Pre-service, making their own Collaborative Art fabric murals with BioColor®, paint scrapers, and Colorations® Washable Glitter Paints. Incorporating hands-on art into your Pre-service is a good way to start the year off, and reminds teachers about why art making is so important to both intellectual and emotional well being.


Here’s another collection of my favorite Collaborative Art ideas from classrooms I have visited this year. I hope they inspire you to do art in a group setting soon. Please send me YOUR favorite ideas and I’d be happy to include them in a future post.


What a great time to work in education, our challenges are greater than ever and there’s no better time to work in a field that contributes to the well-being of children. Have a good summer and rest well so you can get back into the classroom this Fall and do your best work. And remember to learn to reward yourself for working in a field that makes a positive contribution to the world. Because a teacher really does affect eternity - you will never know where your influence ends.

I know you’ve seen this, but I’ll remind you to remind yourself once again: 

“A hundred years from now it will not matter what my bank account was, the sort of house I lived in, or the kind of car I drove. But the world may be a little better because I was important in the life of a child.” ~ Witcraft

Materials Used in Pre-service Canvas Paintings:  BioColor® Paint - set of 11 (BIO16)
Colorations® Washable Glitter Paint - 16 oz bottle (CGP)
Canvas Art Banner (ARTBAN)
Paint Scrapers - set of 4 (SCR)
Good Times Painting Rollers - set of 6 (FUNROLL)

Materials in Other Photographs:
Liquid Watercolor™ Texas Snowflakes - set of 35 (TEXAS)
Classroom Canvas Quilt - 12 pieces (CLASQLT)
Insta-Snow® (SNO)
Colorations® Ultimate Liquid Watercolor™ Paint Kit (LWKIT3)
Colorations® No-Drip Foam Paint - 8 oz bottle (BFP)

* Brought to you by Discount School Supply®

* For more ideas, visit Art and Creativity in Early Childhood Education

Labels: , , , , ,

Monday, January 16, 2012

The Fine Art of Scribbling


Children’s scribbles were once conceived of simply as practice for “real drawing,” but educators today recognize that scribbling is an important step in child development. Scribbling is the foundation of artistic development and is intimately linked with language acquisition. Young children love to scribble and adults will enjoy it too, if you give them permission to “let loose with a crayon.” So, as I pondered what to address in my first post of 2012, it seemed like a good idea to start at the beginning – with the scribble stage.


Scribbling reflects a child’s physical and mental process. This young girl is scribbling with one of my favorite early learning tools, a Colorations® Smooth and Silky Art Stick (SILKYSTK).  Colorations® Silky Sticks are great for toddlers because they’re easy to grasp and make exceptionally smooth, bright marks on paper. When toddlers first pick up a crayon and make a mark, they experience a pleasurable moment in which they use a tool and produce a result. They don’t realize they are taking the first step of a long journey, a journey that will culminate around the age of 8 with a mastery of line that is remarkably controlled. They only know that in this powerful moment, something they did with their body created a visible result and that feels very exciting.

This scribble drawing is from Mona Raoufpour’s 4 year old classroom at Pressman Academy in Los Angeles. Mona artfully links children’s early drawings to language and literacy. Early in the school year, many of her students are immersed in the scribble stage or just moving into more representational drawings. Mona takes meticulous dictations and mounts them directly onto children’s scribble drawings as shown here. Without this detailed dictation, who would ever know that Noah, this young artist, has a story in his mind about a “big monster who ate broccoli then fell down and broke his face and arm and leg.” 


Mona has her 4 year olds work on long term book making projects that include scribble drawings with dictations. Children are indeed natural storytellers, and scribbling is how their visual story telling begins.

No study of scribbling would be complete without mention of Rhoda Kellogg. Kellogg was a pioneer in the study of analyzing children’s art. Over the course of 20 years, Rhoda Kellogg collected and analyzed over 1 million children’s drawings from children ages 2-8. In 1967, she published an archive of 8000 drawings of children ages 24-40 months, focusing on scribbling and the early “ages and stages” of child development. Kellogg concluded that children need plenty of time for free drawing and scribbling to develop the symbols that will later become the basis for all writing and drawing. Before Kellogg, scribbles were considered nonsense. Children were discouraged or even forbidden from scribbling, and encouraged to copy adult models (sounds ghastly and misguided, but this shows how far we’ve come in understanding child development.).


Stages of Scribble
Here's something creative to do with scribble drawings - check out the "Stages of Scribbles" created by children at the Alpert Jewish Community Center in Long Beach, CA. Assistant Director, Alayna Cosores, asked teachers to contribute examples of scribbles and compiled them into an Ages & Stages frame that hangs in their Early Childhood Office. Not only is it colorful and fun to look at, "Stages of Scribble" reminds parents that scribbling is an important process to encourage at home. Why not try something like this in your own center, it costs so little to put together and will provide years of stimulating conversation.


Last but not least, scribbling is not just for kids…it can also be liberating for adults! Scribbling is a physical process that emphasizes freedom of movement. It can help us relax and get into the sensory mode of our bodies as well as the creative, right hemisphere of our brain. With this in mind, I often begin Teacher Trainings with some form of a scribble warm-up. My favorite is a paired up exercise called a “Scribble Chase.”  Click here for the printable lesson plan from my book Smart Art Ideas 2 (MOREART). While the original lesson plan used Colorations® Liquid Watercolor for the top layer, I’ve come to enjoy it even more using Colorations® No-Drip Foam Paint. (BFPSET).


Scribbling is it’s a great way to energize a room at the beginning of a workshop, and we got beautiful results from the Scribble Chase warm-ups shown here. Both were created by teachers at this week’s Messy Art Workshop, hosted by Beach Cities AEYC at Long Beach City College. I suggest you try “grown-up” scribbling sometime soon. Happy New Year!

Materials Used:
Colorations® Smooth and Silky Art Sticks (SILKYSTK, set of 24, or SILKYPAK, set of 72)
Colorations® Regular Crayons (CRS16)
Colorations® No-Drip Foam Paint (BFPSET, set of 7)
White Sulfite Paper (A80SU)
Smart Art Ideas 2 (MOREART)


* Brought to you by Discount School Supply®

Labels: , , , , , , ,

Wednesday, August 10, 2011

BioColor® Monoprints on Fabric, Paper, and Canvas


Last week I attended the International Quilt Festival in Long Beach to see how fabric artist Jane LaFazio uses BioColor® in her Fabric Painting Workshop. I had so much fun and came away with lots of ideas and inspiration. I adapted what I learned from Jane’s adult fabric painting class and simplified it for children’s art making. But before we get to that, let’s look at some of Jane’s inspired students as they use BioColor® and BioColor® Fabric Medium to monoprint on plain white fabric. There was such a creative buzz in the room when I arrived with my camera to take it all in!


To make these fabric designs permanent, students added BioColor® Fabric Medium to their paints as part of their set-up. I was impressed that Jane had marked the fabric medium with a big, bold FM so it would not get confused with the white BioColor®, smart lady! (why hadn’t I thought of that?)


These painted fabric designs were created using 4 basic steps. (1) Apply a thin layer of BioColor® onto a printing plate using a foam roller (2) Drop stencils, drag scrapers and sprinkle rubber bands on top to create shapes & textures (3) Lay fabric on top, then finally…… (3) Rub the fabric with your hands (rubbing long and hard) to transfer the paint, shapes and textures onto the fabric. Jane is quite a whirlwind of inspiration and leads art making safaris to Italy and all sorts of exciting places, so I hope you will look her up sometime, or find other creative “gurus” in your own community to help keep your creative juices flowing.

I came home so excited from the International Quilt Festival that I got out my BioColor® paints and played around to simplify Jane’s ideas for the early childhood classroom. I turned a Colorations® Art Trays upside down and it worked just fine as a printing plate (who knew?).

I especially loved the idea of using rubber bands to create shapes and textures. The results were colorful, creative and easy.

If you want to see what else I discovered in modifying Jane’s ideas for the classroom, watch the video clip below.


Check out Jane LaFazio’s website for more creative ideas at JaneLaFazio.com. Thank you, Jane!

Materials Used:


Good Projects for BioColor® Monoprints:
Canvas Boards (VANGOGH)

Labels: , , , , , ,

Wednesday, May 18, 2011

Painting on Canvas & Studio Art


I visited Creative Care for Children in Santa Barbara last month and found the most inspiring art studio for young children, full of open ended art with emphasis on canvas painting. I was lucky enough to catch a young girl at work, and watched her carefully study each brush stroke and admire the results. Danielle Monroy, the Director and Owner of this inviting In-Home Preschool, told me how much her children enjoyed the freedom of painting and how the youngest children accomplished very impressive self portraits and abstracts, especially when given a stretched canvas to paint on. Here, Danielle shows how she helps children use masking tape to protect some sections of a canvas while they go on to develop other sections. In the painting she is holding here, waxed paper and masking tape are protecting the middle “self portrait” section which the child said was finished, while the background and surrounding areas are further developed. This “masking off” technique is particularly useful when using acrylic paint which is opaque. I’ll talk a little more about acrylics versus other paints at the end of this post.


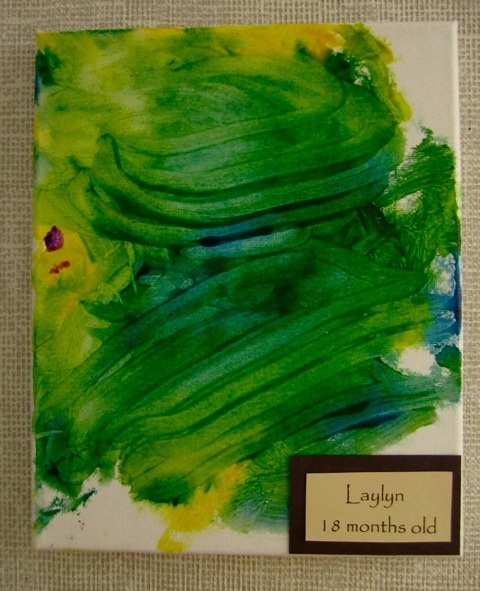
Canvas always makes a painting seem official, as if painting on a canvas makes it “real art.” Maybe that’s because art galleries are filled with canvas paintings, and grownups artists usually paint on canvas. But it’s never too early for children to learn the pleasures of painting on the crisp white surface of canvas board, and with Discount School Supply’s new set of 6 canvas boards, you can do that affordably. Here are examples of toddler paintings on these very boards, taken on a site visit directed by Angie Gish at Grossmont Community College’s Child Development Center in San Diego. Each one is beautiful and their artful gallery display helps create a welcoming, intimate environment in this model toddler classroom.


What paint should you use on canvas? You can use any paint on canvas, but I recommend starting with either BioColor® or Colorations® Simply Washable Tempera and natural bristle easel brushes. Acrylic paint is also popular and offers the ability to layer without transparency, but it is not at ALL washable. Some people wait until elementary school before offering canvas for children to paint on, but I hope these pictures inspire you to dive right in way earlier than that. Have fun developing your art studio and help expand your children’s imaginations through open ended studio art.


Materials you will need:
Canvas – Real Stretched Canvas, set of 6 – Item VANGOGH
Small Easel Brush Set – Best Value Easel Brush Assortment – Item FULLSET
(or)
Classroom Easel Brush Set, set of 24 – Item SHPK
Best Paint Options:
BioColor® – BioColor, Set of 13 Colors - Item BIOSET
Colorations® Simply Washable Tempera – Set of 15 Classic and Cool Colors - Item SWTALL
Acrylic - Colorations Acrylic Paint, set of 8 – Item CACRYLIC

Labels: , , , , ,

Tuesday, April 05, 2011

More X-Ray Handprints!

I just got back from the California AEYC Conference where I delivered workshops on “Art, Literacy & Brain Development.” The handouts from those workshops are posted here (you'll see them on the right sidebar) for you to view or print out. To prepare for the workshops I taught several literacy based art lessons to a variety of children in classrooms that varied from ages 3-5. It was fun leading children through messy art ideas that had a literacy connection, and once again I included the X-Ray Handprint in some of the lessons. These photographs were taken from a Kindergarten class, and the video clip shows a wonderful close-up of a child doing the final phase of scraper art, which reveals her handprints. Take a look!

So many of the conference attendees were excited to learn about X-Ray Handprints, so I decided to post these new photos here. See my previous post from Tuesday, Dec 14, 2010 for more X-Ray Art ideas, or find the complete lesson plan on page 44 in Smart Art 2 (MOREART).


It’s been a busy conference season so I’m a bit late on my monthly post. Thanks for waiting! If you sign up to be an Art and Creativity Blog subscriber, each new post will conveniently come to you as an email. That makes it super easy to get a stream of new art ideas for your classroom. Please subscribe today, you’d be doing me a favor by showing your support. Thank you!

Labels: , ,

Tuesday, December 14, 2010

X-Ray Hand Prints!

Watch how your hand prints seem to magically jump off the page, when you make x-ray hand prints using BioColor® "Scraper Art." X-Ray Scraper Art is an amazing process, take a moment to watch the video clip recorded live at the Discount School Supply NAEYC Math & Science Workshop.


I've also added a new "NAECY Handout" column at right which includes X-Ray Art as part of the NAEYC Math & Science Handout. Please consider printing out and sharing this handout at the next staff meeting! Teachers are always asking for new ideas that teach math and science through hands-on, sensory play. The handouts provided here are written with your "right-brain" in mind, they are easy to digest and rely heavily on diagrams and pictures. You'll find the same applies to Smart Art Ideas Activity Book and Smart Art 2: More Smart Ideas Activity Book.

These photos show 3-year olds making x-ray hand prints as part of teaching nutrition & building strong bodies. This activity provides a great opportunity to talk with children about the importance of milk, yogurt and other calcium rich foods in building good bone health. With that in mind, I added my favorite new science product, the charming little skeleton man (18" Skeleton Model), which allowed me to reference an anatomically correct skeleton model as we began the activity by discussing our bones and hands. This incredibly inexpensive skeleton model is a must-have for science centers.

I hope these photos inspire you to try x-ray hand prints with even the youngest of children. By giving the children a chance to create a colorful paint border around their hand prints, we ended up with delightful paintings that combine art and science in the best of ways.

Materials you'll need:
BioColor® Paint, 16 oz., Black
BioColor® Paint, 16 oz., White
BioColor® Paint Scraper
Nancy™ Paint Bottles Classic Tips, 2 oz. - Set of 12


Enhance this Lesson with:
18" Skeleton Model
More Smart Art Ideas Activity Book
Human X-Rays - Set of 18

Body Banner
Foam Skeleton Floor Puzzle - 15 Pieces

Labels: , , , ,

Wednesday, October 13, 2010

Gardening with BioColor®

I’ve been working with a lot of Science & Outdoor Classroom ideas lately and set up a Root Vue Farm® planter to watch the carrots, radishes and onions grow. I had seen this product for years but never watched one develop, and while I found it very easy to set up, it was so plain to look at that I decided to decorate it with BioColor®.

It’s so much more inviting with the BioColor® design on the plastic “light shield,” that I wanted to pass along this idea. I think it’s a great example of how art, even simple doodles or designs, can always ADD VALUE to any project. Color adds a playful element to activities and is nature’s most delightful form of “sensory stimulation.” I can for sure say that the color I added to my Root-Vue Farm® definitely made my family more interested in keeping track of its developments. It now sits over my kitchen sink in a sunny window, and I find my son lifting up the “light shield” every day to check underneath and see how much the vegetable plant roots have grown.

I planted it on Oct 1 (noted on the plant stakes which come in the kit) – and here it is on Oct 14. The radishes have taken off, although the roots are all very delicate still.

The Root-Vue Farm® kit comes with seeds, soil, and accessories, and an activity guide that gives you several ideas on how to incorporate it into classroom lesson plans. I found it easy to set up, and it took me less than 20 minutes to read the guide (which was well written) and plant the carrots, radishes and onion seeds.

The final set up phase involves inserting a plastic “light shield” onto the front to protect the delicate roots from the sun as they continue to grow.

The light shield was so plain, that I immediately thought of painting it with BioColor®, which of course sticks to plastic, so was the perfect choice for paint. I first cut out the Root Vue log from the cover of the Activity Guide and glued it onto the light protector, since I figured we would be studying the root growth for a few months and I wanted visitors to see at a glance what this project was. Labeling is always good for language development, so I suggest doing this in the early childhood classroom as well.

Now for the painting part: I set out to paint on my kitchen counter, squirting a few colors of BioColor® onto a paper plate and rolling through them with patterned foam rollers. I chose the square roller pattern from the Colorations® Cool Designs Foam Roller - Set of 12, which has six different designs. It's easy to get a "cool design" onto the light shield in no time.

Gardening is a great way to teach science to children, and helps foster curiosity and wonder. How a small seed can grow into a radish or a carrot is one of nature’s greatest miracles. I’m glad I took the time to start up a Root-Vue Farm® and look forward to seeing root vegetables grow on my kitchen window sill in the weeks to come. Please join me if you can!

Labels: , , , ,

Monday, September 20, 2010

CD Photo Frames

Recycle old CD’s and turn them into colorful picture frames, using BioColor® and your favorite photos. Since BioColor® sticks to plastic and other slick surfaces, it’s easy! Simply collect used CD’s and choose photographs with images that are small enough to cut out, glue down, and still leave enough room to add BioColor® paint. This recycled art project is easy, inexpensive, and unique!

This first example shows a wedding photo created with a BioColor® design that lets the shiny CD peek through. After gluing down the picture, I used gold BioColor® to create a circular border, then I applied black and yellow BioColor® around the photo into a star shaped design. It hangs in a prominent spot on my wall at home, and is often a conversation piece. People love it when they realize the picture is simply glued onto a CD then painted. No other tempera paint will stick to plastic, so this recycled art project makes good use of BioColor®’s unique property of sticking to slick surfaces.

These next two photo frames are simpler examples of the same process and could easily be created by younger children. Apply BioColor® using pre-filled plastic Nancy™ Bottles. When making a photo frame, it’s important to have something to hang the frame from. The easiest way to create a hanger is with a loop of yarn. Slip a 12” strand of yarn through the center of the CD hole, and tie it at the top. Now glue on your photo using tacky glue, and begin applying BioColor® any way you like. It’s easy to make dots of various colors, and a little more challenging to create lines, like the blue and white heart shapes shown here. Start with dots if you want to start easy. Drag a toothpick through the dots to create little swirly designs if you like.

Apply BioColor® in dots and lines directly from Nancy™ Bottles, or use a paintbrush, or combine both. In this close-up you’ll see that dots were applied from Nancy™ Bottles first, then a paintbrush was used to spread around the paint and change the surface texture. You want a fairly thick layer of BioColor®, so make sure to lay it on a flat surface to dry overnight.

Another fun idea for Recycled CD’s is to make Dream Catchers using BioColor®, feathers, and collage materials. Traditional Dream Catchers hang over beds and “catch bad dreams” before they bother your sleep. Authentic Native American Dream Catchers can be very intricate and beautiful. These playful imitations, or what I like to call “Urban Dream Catchers,” are a fun way to imitate the real deal.

Lastly, here’s a picture of my workspace before I began making some of these samples. This recycled art idea has easy set up, and uses very affordable supplies, probably no more than 10 cents per project. And if you’re like me, you have dozens of old CD’s stacked around, just waiting to come to life as something shiny, fun and artful.

Materials You’ll Need:
CD Photo Frames:
Used CD’s
Yarn – 5LBR - Remnant Yarn, 5 lbs

Urban Dream Catchers:

For more ideas on how to use BioColor® on slick surfaces check out this video!

Labels: , , , ,