Art and Creativity

Art is important for children especially during their early development. Research shows that art activities develop brain capacity in early childhood; in other words, art is good brain food! Art engages children’s senses in open-ended play and develops cognitive, social-emotional and multi-sensory skills. As children progress into elementary school and beyond, art continues to provide opportunities for brain development, mastery, self esteem and creativity.

Tuesday, September 11, 2012

Welcome Back! Let’s Start with Art


Welcome back to school! It’s a fresh new school year and the season of beginnings. Many of you already have classrooms filled with eager, bright and often shy new faces. Others are busily preparing for that exciting first day of class. All of us, whether we are teachers, parents or simply “grown ups” who love children are eagerly anticipating a year of joyful learning.

Let’s explore how ART ties in with those first exciting weeks of school.

How do YOU use art to help children engage in your classroom? Here’s a useful handout to send home with parents as school begins - it helps them understand how they can partner with you in using art to help children grow and become their best selves.


Recently I asked a group of seasoned teachers about their favorite “first art project.” Several responded with SELF PORTRAITS, I liked that! But given that there are so many drawing materials to choose from for a self portrait, where is a teacher to begin? I love the use of BOLD permanent markers for early self portraits. Here are some examples of back to school self portraits from Francine Farkas’s 4-year-old class.


Francine gives children bold, permanent markers to draw with so their portraits really “pop” on the page. She keeps these initial self portraits in her children’s Art Portfolios (more on that in a future post) and they will serve as a “baseline” drawing of each child’s development when the year began. Each portrait will be saved and shared at parent/teacher conferences and will serve as a valuable reference point for measuring developmental growth as the year goes by.


Francine mounts each portrait onto construction paper to emphasize the importance of each one and to create an “art gallery” effect. Because her classroom is not so large, she uses the supply door closet as a gallery space.


The teacher next door took a different approach to her “first art” self portraits, still using bold permanent markers so the portraits “pop” on the page, but adding a photograph of each child. Look closely at the clever use of a blank picture frame held by each child in its photograph.


This teacher’s laminated self portraits hang outside her classroom door. What a delightful way for both children and parents to be greeted at the start of each new day.


Teachers in the four-year-old classrooms at Pressman Academy often leave fine tipped, black permanent markers (PERMBLK) out for open-ended drawing, and as a result children create bold pictures with a sense of authority.

One other thing: When I asked my group of seasoned teachers for their favorite “art tip” to start the new year right, they said to offer lots of open ended exploration of art materials right from the start. This included the simplest idea of starting out with easy to use Colorations® tempera cakes (A8TCA) with Colorations® easy grip brushes (EGBRUSH).


And moved on to including unusual sensory art ideas that children would not likely find at home. Such as these rainbow striped pom pom balls (COLORPOM) in a sensory tub (TUBS) which I saw in one classroom, and those same colorful pom poms in another classroom on trays with sea and zoo  sticks (AP632J) and a variety of other pinch grippers. I loved both these applications! And I also imagined several other things we might do with these same colorful, oversized pom poms.


Have a wonderful new year, and don’t forget to stock up on fun new art materials to inspire your students and keep YOU feeling inspired as well.

 
Materials Used:
 
* Brought to you by Discount School Supply®

* For more ideas, visit Art and Creativity in Early Childhood Education


Labels: , , , , , , ,

Monday, January 16, 2012

The Fine Art of Scribbling


Children’s scribbles were once conceived of simply as practice for “real drawing,” but educators today recognize that scribbling is an important step in child development. Scribbling is the foundation of artistic development and is intimately linked with language acquisition. Young children love to scribble and adults will enjoy it too, if you give them permission to “let loose with a crayon.” So, as I pondered what to address in my first post of 2012, it seemed like a good idea to start at the beginning – with the scribble stage.


Scribbling reflects a child’s physical and mental process. This young girl is scribbling with one of my favorite early learning tools, a Colorations® Smooth and Silky Art Stick (SILKYSTK).  Colorations® Silky Sticks are great for toddlers because they’re easy to grasp and make exceptionally smooth, bright marks on paper. When toddlers first pick up a crayon and make a mark, they experience a pleasurable moment in which they use a tool and produce a result. They don’t realize they are taking the first step of a long journey, a journey that will culminate around the age of 8 with a mastery of line that is remarkably controlled. They only know that in this powerful moment, something they did with their body created a visible result and that feels very exciting.

This scribble drawing is from Mona Raoufpour’s 4 year old classroom at Pressman Academy in Los Angeles. Mona artfully links children’s early drawings to language and literacy. Early in the school year, many of her students are immersed in the scribble stage or just moving into more representational drawings. Mona takes meticulous dictations and mounts them directly onto children’s scribble drawings as shown here. Without this detailed dictation, who would ever know that Noah, this young artist, has a story in his mind about a “big monster who ate broccoli then fell down and broke his face and arm and leg.” 

Mona has her 4 year olds work on long term book making projects that include scribble drawings with dictations. Children are indeed natural storytellers, and scribbling is how their visual story telling begins.

No study of scribbling would be complete without mention of Rhoda Kellogg. Kellogg was a pioneer in the study of analyzing children’s art. Over the course of 20 years, Rhoda Kellogg collected and analyzed over 1 million children’s drawings from children ages 2-8. In 1967, she published an archive of 8000 drawings of children ages 24-40 months, focusing on scribbling and the early “ages and stages” of child development. Kellogg concluded that children need plenty of time for free drawing and scribbling to develop the symbols that will later become the basis for all writing and drawing. Before Kellogg, scribbles were considered nonsense. Children were discouraged or even forbidden from scribbling, and encouraged to copy adult models (sounds ghastly and misguided, but this shows how far we’ve come in understanding child development.).


Stages of Scribble
Here's something creative to do with scribble drawings - check out the "Stages of Scribbles" created by children at the Alpert Jewish Community Center in Long Beach, CA. Assistant Director, Alayna Cosores, asked teachers to contribute examples of scribbles and compiled them into an Ages & Stages frame that hangs in their Early Childhood Office. Not only is it colorful and fun to look at, "Stages of Scribble" reminds parents that scribbling is an important process to encourage at home. Why not try something like this in your own center, it costs so little to put together and will provide years of stimulating conversation.


Last but not least, scribbling is not just for kids…it can also be liberating for adults! Scribbling is a physical process that emphasizes freedom of movement. It can help us relax and get into the sensory mode of our bodies as well as the creative, right hemisphere of our brain. With this in mind, I often begin Teacher Trainings with some form of a scribble warm-up. My favorite is a paired up exercise called a “Scribble Chase.”  Click here for the printable lesson plan from my book Smart Art Ideas 2 (MOREART). While the original lesson plan used Colorations® Liquid Watercolor for the top layer, I’ve come to enjoy it even more using Colorations® No-Drip Foam Paint. (BFPSET).


Scribbling is it’s a great way to energize a room at the beginning of a workshop, and we got beautiful results from the Scribble Chase warm-ups shown here. Both were created by teachers at this week’s Messy Art Workshop, hosted by Beach Cities AEYC at Long Beach City College. I suggest you try “grown-up” scribbling sometime soon. Happy New Year!

Materials Used:
Colorations® Smooth and Silky Art Sticks (SILKYSTK, set of 24, or SILKYPAK, set of 72)
Colorations® Regular Crayons (CRS16)
Colorations® No-Drip Foam Paint (BFPSET, set of 7)
White Sulfite Paper (A80SU)
Smart Art Ideas 2 (MOREART)


* Brought to you by Discount School Supply®

Labels: , , , , , , ,

Wednesday, August 10, 2011

BioColor® Monoprints on Fabric, Paper, and Canvas


Last week I attended the International Quilt Festival in Long Beach to see how fabric artist Jane LaFazio uses BioColor® in her Fabric Painting Workshop. I had so much fun and came away with lots of ideas and inspiration. I adapted what I learned from Jane’s adult fabric painting class and simplified it for children’s art making. But before we get to that, let’s look at some of Jane’s inspired students as they use BioColor® and BioColor® Fabric Medium to monoprint on plain white fabric. There was such a creative buzz in the room when I arrived with my camera to take it all in!


To make these fabric designs permanent, students added BioColor® Fabric Medium to their paints as part of their set-up. I was impressed that Jane had marked the fabric medium with a big, bold FM so it would not get confused with the white BioColor®, smart lady! (why hadn’t I thought of that?)


These painted fabric designs were created using 4 basic steps. (1) Apply a thin layer of BioColor® onto a printing plate using a foam roller (2) Drop stencils, drag scrapers and sprinkle rubber bands on top to create shapes & textures (3) Lay fabric on top, then finally…… (3) Rub the fabric with your hands (rubbing long and hard) to transfer the paint, shapes and textures onto the fabric. Jane is quite a whirlwind of inspiration and leads art making safaris to Italy and all sorts of exciting places, so I hope you will look her up sometime, or find other creative “gurus” in your own community to help keep your creative juices flowing.

I came home so excited from the International Quilt Festival that I got out my BioColor® paints and played around to simplify Jane’s ideas for the early childhood classroom. I turned a Colorations® Art Trays upside down and it worked just fine as a printing plate (who knew?).

I especially loved the idea of using rubber bands to create shapes and textures. The results were colorful, creative and easy.

If you want to see what else I discovered in modifying Jane’s ideas for the classroom, watch the video clip below.


Check out Jane LaFazio’s website for more creative ideas at JaneLaFazio.com. Thank you, Jane!

Materials Used:


Good Projects for BioColor® Monoprints:
Canvas Boards (VANGOGH)

Labels: , , , , , ,

Wednesday, May 18, 2011

Painting on Canvas & Studio Art


I visited Creative Care for Children in Santa Barbara last month and found the most inspiring art studio for young children, full of open ended art with emphasis on canvas painting. I was lucky enough to catch a young girl at work, and watched her carefully study each brush stroke and admire the results. Danielle Monroy, the Director and Owner of this inviting In-Home Preschool, told me how much her children enjoyed the freedom of painting and how the youngest children accomplished very impressive self portraits and abstracts, especially when given a stretched canvas to paint on. Here, Danielle shows how she helps children use masking tape to protect some sections of a canvas while they go on to develop other sections. In the painting she is holding here, waxed paper and masking tape are protecting the middle “self portrait” section which the child said was finished, while the background and surrounding areas are further developed. This “masking off” technique is particularly useful when using acrylic paint which is opaque. I’ll talk a little more about acrylics versus other paints at the end of this post.


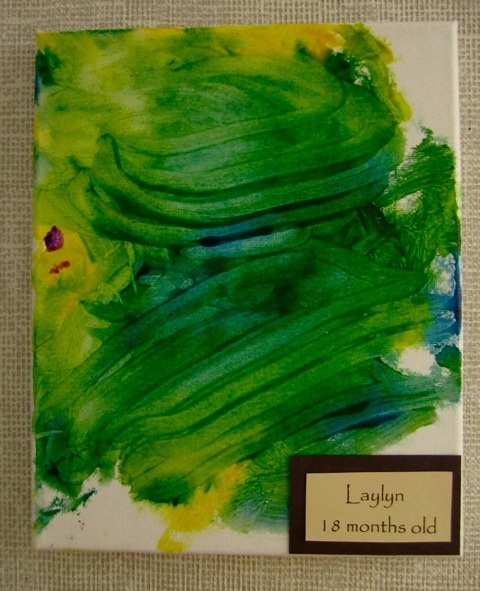
Canvas always makes a painting seem official, as if painting on a canvas makes it “real art.” Maybe that’s because art galleries are filled with canvas paintings, and grownups artists usually paint on canvas. But it’s never too early for children to learn the pleasures of painting on the crisp white surface of canvas board, and with Discount School Supply’s new set of 6 canvas boards, you can do that affordably. Here are examples of toddler paintings on these very boards, taken on a site visit directed by Angie Gish at Grossmont Community College’s Child Development Center in San Diego. Each one is beautiful and their artful gallery display helps create a welcoming, intimate environment in this model toddler classroom.


What paint should you use on canvas? You can use any paint on canvas, but I recommend starting with either BioColor® or Colorations® Simply Washable Tempera and natural bristle easel brushes. Acrylic paint is also popular and offers the ability to layer without transparency, but it is not at ALL washable. Some people wait until elementary school before offering canvas for children to paint on, but I hope these pictures inspire you to dive right in way earlier than that. Have fun developing your art studio and help expand your children’s imaginations through open ended studio art.


Materials you will need:
Canvas – Real Stretched Canvas, set of 6 – Item VANGOGH
Small Easel Brush Set – Best Value Easel Brush Assortment – Item FULLSET
(or)
Classroom Easel Brush Set, set of 24 – Item SHPK
Best Paint Options:
BioColor® – BioColor, Set of 13 Colors - Item BIOSET
Colorations® Simply Washable Tempera – Set of 15 Classic and Cool Colors - Item SWTALL
Acrylic - Colorations Acrylic Paint, set of 8 – Item CACRYLIC

Labels: , , , , ,

Tuesday, February 15, 2011

Art in the Outdoor Classroom

Recently I attended an Outdoor Classroom conference at Child Educational Center in Pasadena, and took photographs of their outdoor areas. These photos illustrate just some of the ways CEC artfully integrates drawing, painting, sand tray, natural collage, 3-D sculpture and mud pit activities into their outdoor curriculum.


Art and outdoor sensory play provide children with delightful ways to experience the joy of self discovery, especially when these activities are child initiated and teacher supported. Many wonderful sensory activities like making mud pies would be prohibitive indoors but are unforgettable outdoor experiences. Sensory experiences with dirt, leaves, pinecones, sea shells, feathers, wood and other natural materials help children develop a positive relationship with nature and help them appreciate the wonders of earth science.

Here's my favorite excerpt from a handout provided at one of the conference workshops, it is credited to Dr. Bruce Perry, author of Shared Discovery - Shared Learning.

Curiosity and Brain Development
Curiosity.........leads to Exploration
Exploration.....leads to Discovery
Discovery.......leads to Pleasure
Pleasure.........leads to Repetition
Repetition.......leads to Mastery
Mastery..........leads to New Skills
New Skills.......lead to Confidence
Confidence.....leads to Self Esteen
Self Esteem....leads to Sense of Security
Security..........leads to More Exploration

I hope these words and photographs inspire your own curiosity and exploration, and help you discover new ways to integrate art and sensory play into your outdoor classroom.

Materials Shown Here:
Natural Recycled Drawing Paper, 9NCS
Portable Drawing Boards, SCRIB
Colored Masking Tape, NMASK
Sea Shells, SHELLS
Natural Feathers Classroom Pack, NATURAL
Wood Geo Shapes, 1000W
Wood Craft Rounds, WOOD50
Colored Wood Cubes, CWCB
Colorations Liquid Watercolors, set of 8 - PLWS
Super Safe Plastic Droppers, 12SSD
Hanging Outdoor Double Easel, HDE


Labels: , , , ,

Tuesday, January 18, 2011

Reggio Inspired Use of Liquid Watercolor

I just had the good fortune to attend an inspiring BJE Early Childhood Institute hosted by Adat Ari El Synagogue in Los Angeles. I was completely mesmerized by Adat Ari El’s classrooms, which were full of life and color, and clearly reflected engaged learners. I found great pleasure and inspiration from their use of art and the way children responded to their open ended approach to creativity. Check out these colorful examples:


Their ECE Director, Beryl Straus, explained to me that Adat Ari El has been slowly incorporating Reggio Emilio principles into their curriculum for seven years. Adat Ari El preschool is known in LA as one of the places to schedule a site visit if you want to learn more about the Reggio approach to learning. But Beryl pointed out to me that their Reggio inspired program didn’t happen overnight - that their curriculum is always in a fluid state of change, adaptation, and improvement. They have an “Atelier” (art studio) and an “Atelierista” (art specialist) – how exciting! But each of their teachers also incorporates art in their classroom daily, and they share ideas and materials with Tali Soffer, their Atelierista. Adat Ari El preschool is a truly engaging environment and I’m happy to share photos from their Atelier and classroom art here, by video clip. Most of the artwork shown here uses Liquid Watercolor, one of my favorite paints. I found Liquid Watercolor being used in every classroom, with beautiful results.


If you are receiving this as a Blog Subscriber and cannot view the video clip, please log onto

www.ArtandCreativity.blogspot.com

Materials List


Colorations Liquid Watercolor - complete set of colors

Colorations Liquid Watercolor Kit

Colorations Oil Pastels

Real Watercolor Paper - 50 Sheets

Colorations® Super Classroom Paint Brush Set

Labels: , , , , , , , , , , , ,

Wednesday, July 07, 2010

The Source of My Strength

The following is adapted from a workshop that I did for Discount School Supply customer, A Window Between Worlds (AWBW). AWBW is a training & resource agency for battered women's shelters. AWBW serves women and children at shelters and this workshop helped their training for Program Coordinators from shelters throughout Southern California. For more information about AWBW and using art as a tool for heailng, check out http://www.awbw.org/.

Objective: This month's workshop is designed to engage teens in a creative exercise to identify the things about them that are strong. They will create symbols that help represent the source of their own personal strength, so that they will be able to more quickly and readily understand their strengths and access them when needed.

Materials:

Colorations® Smooth & Silky Art Sticks
BioColor Paint (4 colors plus silver and gold = 6 total colors)
Nancy Paint Bottles Twist Tops (optional)
Balloons - one per person
Small paper plates - one per person
White Cardboard Pencil Box - one per person
White heavy weight construction paper (for warm-up and handmade stencils)
Paper towels for cleanup
Colorations® Glitter Paint (optional)
Paint Brushes – one small & one large
Colorations® Glue
Cups with water

Prep: Pre-fill Nancy Bottles with BioColor, filling 4 bottles with standard BioColor and one each of gold and silver, for a total of 6 Nancy Bottles full of BioColor per small group of participants. Fill one Nancy Bottle with paint for every 4 people. Try out each warm-up application before the workshop. Make yourself a sample of the Source of Our Strength Box to familiarize yourself with each stage, and so you will be confident leading the session. Create your sample box from your own voice as a healer, someone who provides healing, compassion and positive solutions for children.

Setup:

1.) In the middle of the table place 4 standard and 2 metallic BioColors in Nancy Bottles, 1 Nancy Bottle of glitter paint, 1 set of Silky Sticks. Place an extra small stack of white construction paper for warm ups.
2.) In front of each seat, place 2 sheets construction paper, 1 balloon and one paper plate.

Demonstration:

Note: During the demo/warm-up, it is useful to first do a demonstration of each step and then give participants a turn.

Art Material Demo and Warm-up #1: Balloon Printing with BioColor

Step 1: Using 4 standard colors of BioColor, plus silver and gold, place quarter-sized dots of paint in center of plate.

Step 2: Blow up balloons, not too big, so they fit into your fist or grasp (2"- 3").

Step 3: Firmly press balloon straight down into paint palette, then "print" paint onto paper. Bounce/print balloon all over.

Step 4: Create stencil patterns. Using thick, white construction paper, tear stencils by folding the paper in half and tear out images as if you were making a snowflake. Position stencil and balloon print on top. Remove stencil to see pattern surface. Repeat. Overlap stencils and repeat with a variety of colors to create a pleasing design.

Art Material Warm Up #2: Intro to Silky Sticks

Step 1: Dry Application: Take a few different Silky Stick colors and make a simple doodle
to experience the materials, pressing hard to lay down bright pigments. Don't think about it too much, take this time to "loosen up" and leave your critical voice behind.


Step 2: Wet Application: Dip Silky Sticks into water before making another doodle. Experience the difference in wet and dry applications.

Step 3: Wet Application with Paintbrushes: Take your larger paintbrush and dip it into water. Apply your wet brush to your original dry doodle, creating a "flow-release" effect as it releases the colored pigment into a dilution of color, like a watercolor. Next take your smaller "detail" brush and dip it into water, making more detailed flow effects. You can also use your wet brush, or finger, directly on your Silky Stick as if it were a dry watercolor cake, and use your finger or brush directly onto your paper. Set aside all the warm up creations to make room for the activity.

Introduction & Relaxation:

Ask the participants to try to relax, put down their art materials, and if they wish, close their eyes for a few minutes while you guide them through a brief period of self-reflection.

Continue with this dialogue (or change the concept to your own voice):

Today's workshop is meant to to focus on our strengths, so that we can increase our sense of safety and well-being. We will remind ourselves today that we are each strong enough not only to survive, but to overcome and rise above what has happened to us in the past. Today is about living in the present moment of strength, community, healing and support. Our artwork will help us focus on what it is that makes us strong and keeps us strong. With that in mind, try to relax and reflect upon where it is that you find your own personal strength. In times of need, do you call upon your faith to give you strength? Or do you think of your mother, your brothers or sisters, your friends, or something else to makes you feel strong? When you ask for help, who listens? What is the source of your strength? (Give people a short quiet time to reflect on this question). Now, open your eyes and take your Silky Sticks and a fresh piece of paper, and DRAW A SYMBOL that represents the SOURCE OF MY STRENGTH. Your symbol can be made up of one image, or a combination of images. Just do what comes naturally. There is no right or wrong way to create a visual symbol. The easiest way is to simply get started and see what happens!

Creation:

Part 1: Inside of Box

Take your SOURCE OF MY STRENGTH drawing and re-create it on the inside of your pencil box, using the Silky Sticks. Consider your original warm-up sketch as a starting point, and re-create the image in a more finished form on the inside of your box, adding details and embellishing it however feels right. Don't over think it, just let it flow without being critical of how it looks or what it means. As you create your visual symbol of strength on the inside of your box, imagine you are creating this image from your source. Whatever comes of this experience will be the "right" image of strength for you today.
Part 2: Outside of Box

Now comes the time to decorate the outside of your box more playfully, by balloon printing the outside with BioColor and your own handmade paper stencils. Add glitter paint if you want to add sparkle. Create a design of your choice, so that when you place it on a shelf or dresser table where you live, you will be reminded of a pleasant time spent with creativity and community. No one but you will know that inside this box lay very important symbols, symbols that represent the source of your strength and the inner resources you call upon.
Closing:

Have participants share their boxes with a partner, or with the group. If they share with a partner reinforce the importance of being a good listener (i.e. paying attention and not interrupting). Encourage the participants to look inside their "Strong Box" whenever they need to be reminded of their personal strength.

Tips:

When selecting boxes to decorate, be sure to purchase ones that have an unfinished surface, like the ones from Discount School Supply. A slick, or glossy surface will not allow the paint to stick.

Labels: , , , , , ,

Monday, March 31, 2008

Art Gallery Activity

Inexpensive photo frames make a colorful Wall Gallery and allow you to easily change out artwork. These were purchased from Ikea for six dollars each, but Target, the 99cents store, and other value oriented retailers carry similar bargains. Make the project even better by decorating your own frames using simple and affordable beads, pipe cleaners and lace.


It's important to display artwork tastefully to show off its value. Mounting or framing the simplest artwork brings out its aesthetic appeal. You may even know a woodworker or retired hobbyist who could handcraft simple wooden frames for your Gallery Wall. Don't forget when you display art to make sure everyone’s artwork is included.

Labels: , , ,